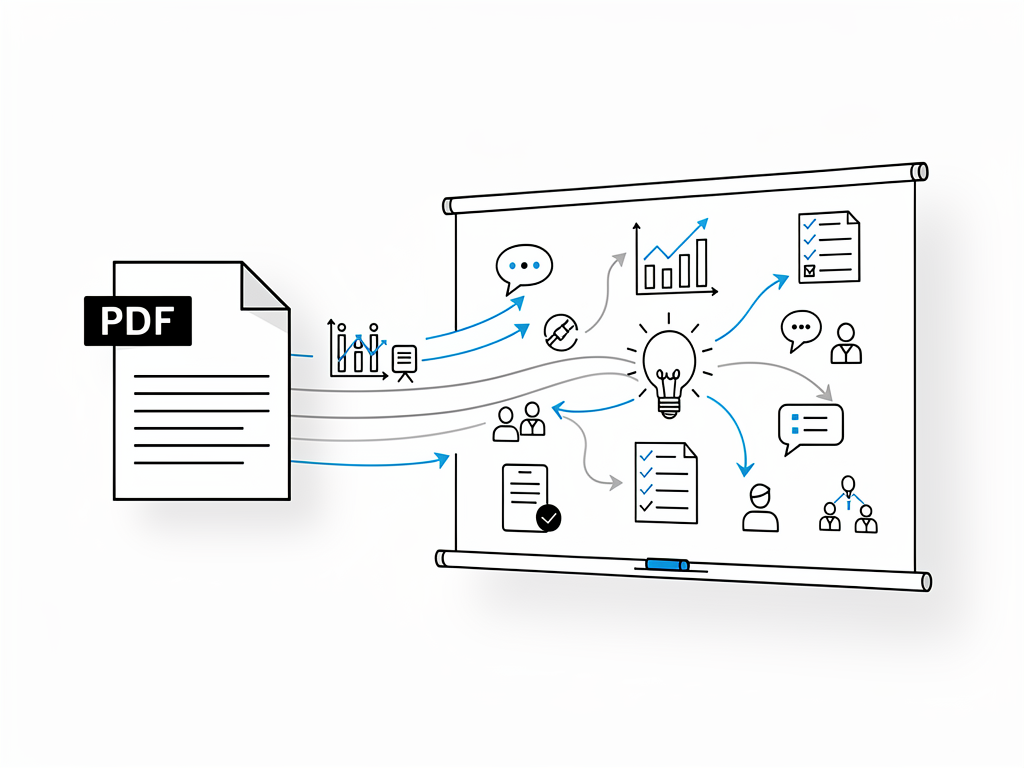
You have a PDF—a guide, a whitepaper, a process document, a research summary—and you need it to reach people who won't read it. An explainer video turns that static document into a narrated animation that holds attention and makes the content stick. The fastest way to do this is to upload the PDF directly to an AI video generator, let it extract the key points, auto-generate scenes, and add AI narration. No script writing, no manual storyboarding, no animation software.
Here's the concrete workflow: upload your PDF, review the auto-generated script, tweak it if needed, pick a narration language and voice, and render. The whole process takes 10–20 minutes for a 3–5 minute video.
What happens when you upload a PDF to an explainer video generator?
When you upload a PDF, the AI reads the text and structure, extracts the core ideas, and converts them into a script. It then generates a sequence of whiteboard scenes—drawings, text callouts, arrows, and transitions—that visualize each point. Finally, it adds AI narration that matches the pacing of the animation.
The quality of the output depends on how well the PDF is structured. A document with clear headings, bullet points, and logical flow produces a tighter script and better scene sequencing. A dense wall of text or a PDF with mostly images may require manual editing of the script before rendering.
Most AI video generators let you edit the script before finalizing, so you can trim jargon, reorder points, or add emphasis. Some also let you upload a reference image alongside the PDF—a logo, a diagram, or a brand screenshot—to guide the visual style.
Which PDFs work best for video conversion?
The ideal PDF for video conversion has these traits:
- Clear structure: Headings, subheadings, and numbered or bulleted lists. The AI uses these to break the content into scenes.
- Concise language: Short paragraphs and punchy sentences convert to tighter narration and faster pacing.
- Logical flow: Content that moves from problem → solution → benefit or concept → examples → conclusion translates naturally into a video narrative.
- Moderate length: A 5–10 page PDF typically becomes a 3–5 minute video. Longer documents may need to be split or condensed.
- Minimal images or charts: PDFs heavy on visuals (infographics, photos, complex diagrams) may not convert as cleanly. The AI will generate its own whiteboard scenes instead of using the original images, which is usually better for animation but may lose design nuance.
Examples that work well: - Product guides and onboarding docs - Process flowcharts and SOPs - Research summaries and white papers - FAQ documents - Case study writeups - Training materials
Examples that need prep: - Dense legal or compliance documents (consider extracting the key points first) - PDFs that are mostly scanned images (the AI can't read them) - Marketing brochures with heavy design (the AI will rebuild the visuals, which may not match the original aesthetic)
How do you prepare a PDF for the best video output?
Spend 10 minutes prepping your PDF before upload to get a cleaner result:
1. Trim to scope. If the PDF is 20+ pages, extract just the section you want to animate. A focused 5–8 page PDF produces a tighter video.
2. Add or clean up headings. Make sure each major section has a clear heading. The AI uses these to structure scenes. If headings are buried in the text, edit the PDF or re-save it with better formatting.
3. Break up dense paragraphs. Convert long blocks of text into bullet points or short sentences. The AI will pace the narration faster and the video will feel less like a voiceover-over-slides.
4. Remove or simplify tables. Complex tables don't animate well. If a table is critical, consider converting it to a bulleted summary or a simple numbered list.
5. Check for clarity. Read the PDF aloud (or use a text-to-speech tool) to catch awkward phrasing or jargon that won't work in narration. The AI will read what's there, so fix it now.
6. Save as a clean PDF. If you're exporting from a doc or slide deck, use "Export as PDF" rather than "Print to PDF" to preserve text formatting and searchability.
What's the step-by-step process to convert a PDF into a video?
Here's the exact workflow using Ankon AI:
Step 1: Upload the PDF Log in, click "Create Video," and select "Upload Document." Choose your PDF file. Ankon AI reads the text and generates an initial script.
Step 2: Review and edit the script The auto-generated script appears in the editor. Read through it. You can: - Delete sentences or paragraphs that are off-topic or redundant - Reorder points if the AI grouped them differently than you'd like - Add emphasis or context - Shorten or expand sections
This is your chance to steer the video's tone and pacing. A 3-minute video typically has 300–400 words of narration, so trim aggressively if the script is longer.
Step 3: Choose narration settings Pick a language (13 supported via AI voiceover) and a voice. If you're on the Pro plan or higher, you can use voice cloning—record a 10-second clip of your own voice once, and the AI will narrate in your voice across all 13 languages. This adds a personal touch and is especially useful for internal training or founder-led content.
Step 4: Enable optional features - Enhance mode: Doubles the number of scenes for smoother transitions and richer visuals. Costs 2× credits but produces a more polished video. - Fact-check: An independent pass that flags made-up facts or unsupported claims in the script. Useful for research or compliance content. Costs +1 credit. - Captions: Burned-in captions and SRT export are included; toggle on if needed.
Step 5: Render Click "Generate Video." Fast render is free—same cost whether you choose standard or fast. Rendering typically takes 2–5 minutes depending on video length and queue.
Step 6: Review and download Once rendering is complete, preview the video. Check for: - Pacing: Does the narration match the scene changes? - Accuracy: Are the visuals aligned with the script? - Branding: If you added a custom logo, does it appear?
Download the MP4 or export captions as SRT. You can also re-edit and re-render if needed.
How much does it cost to convert a PDF to a video?
Cost depends on video length and features. Ankon AI uses a credit system: 1 credit = 1 minute of finished video (2-credit minimum per video).
Example costs: - A 3-minute video from a PDF = 3 credits base - Same video with Enhance mode = 6 credits (2× for richer scenes) - Same video with Enhance + Fact-check = 7 credits (+1 for fact-check)
Plan options: - Starter ($29/mo): 15 credits/month ≈ 7–8 videos - Plus ($69/mo): 40 credits/month ≈ 20 videos - Pro ($119/mo): 75 credits/month ≈ 37 videos (includes voice cloning) - Studio ($249/mo): 160 credits/month ≈ 80 videos (includes API access)
Annual billing gives ~20% off. You can also buy one-off credits at $2 per credit (minimum $10, packs of 5–250).
All active subscribers render without a watermark. Free-tier videos carry a small "Made with AnkonAI" badge (toggleable).
Can you edit the video after it's rendered?
Yes. After rendering, you can: - Re-edit the script and re-render the same video (no extra cost, just re-use the credits if it fails) - Export captions as SRT and edit them in a subtitle editor - Download the MP4 and edit it in a video editor (trim, add music, overlay graphics, etc.)
If you want to change the narration language, voice, or script, you'll need to re-render, which costs credits again. Failed renders are auto-refunded, so you don't lose credits if something goes wrong.
What if your PDF has images or diagrams you want to keep?
Ankon AI generates its own whiteboard scenes rather than embedding the original PDF images. This is usually a strength—the animated scenes are cleaner and more engaging than static screenshots. But if your PDF has a critical diagram, logo, or visual you want to preserve, you have options:
Option 1: Upload a reference image When creating the video, you can upload a reference image (PNG, JPG, or WEBP) alongside the PDF. The AI uses it as a visual guide for the scene style and branding.
Option 2: Edit the script to describe the diagram If the PDF contains a flowchart or process diagram, rewrite the relevant section of the script to describe it step-by-step. The AI will generate animated scenes that visualize the description.
Option 3: Post-edit the video Download the rendered MP4 and use a video editor to overlay or insert the original images at specific timestamps.
What are common mistakes when converting PDFs to video?
Uploading without editing. If the PDF is dense or poorly formatted, the AI will produce a script that's hard to follow or too long. Spend 10 minutes prepping the PDF first.
Keeping the script too long. A 10-page PDF doesn't need to become a 10-minute video. Trim ruthlessly. Viewers drop off after 5–6 minutes, so aim for 3–5 minutes and hit the key points.
Ignoring the auto-generated script. The AI does a good job, but it's not perfect. Always review and edit the script before rendering. Fix jargon, reorder if needed, and add a human touch.
Not using Enhance mode for important videos. If this is a client deliverable or a training video that needs to look polished, Enhance mode is worth the extra credits. The smoother pacing and richer visuals make a noticeable difference.
Forgetting to add captions. Captions increase accessibility and watch-through rate, especially on social media or in noisy environments. Enable them.
When should you use a PDF-to-video tool vs. writing a script from scratch?
Use the PDF upload method when: - You already have written content (a guide, a doc, a whitepaper) that you want to repurpose. - You want to save time on script writing. - The PDF is well-structured and clear. - You need a quick turnaround (10–20 minutes vs. hours of manual scripting).
Write a script from scratch when: - You're creating a brand-new explainer for a product or concept that doesn't have existing documentation. - You want full creative control over the narrative arc and pacing. - The PDF is poorly written or doesn't translate well to video format. - You're targeting a specific audience or tone that the auto-generated script might miss.
In practice, many teams do both: use the PDF upload to get a fast first draft, then refine the script for a second render if needed.
How do you distribute a PDF-converted video?
Once rendered, you have an MP4 file. Use it for: - Internal training: Upload to your LMS or Slack. - Customer onboarding: Embed on your website or send via email. - Social media: Post to LinkedIn, YouTube, Twitter, or TikTok (trim to 60–90 seconds for short-form feeds). - Sales and marketing: Use in product demos, landing pages, or email campaigns. - Documentation: Pair the video with the original PDF on a help page or knowledge base.
If you need multiple formats or languages, you can re-render the same video with a different narration language and voice—each render costs credits, but the script stays the same.
Verdict
Converting a PDF to an explainer video is now a 20-minute workflow instead of a multi-day project. Upload, edit the script, render, and download. The key is prepping the PDF first—clear structure, concise language, and logical flow produce the best results. If you have existing documentation that needs to reach a wider audience, this is the fastest way to turn it into engaging video content. Start with Ankon AI's 2 free credits to test the workflow on a sample PDF, then decide if a paid plan fits your volume.